Released in 2012, Clash of Clans has remained a formidable force in the gaming world, thanks to a steady stream of fresh players and content. While the game mechanics have seen minimal alterations over time, its publishing strategy continues to embody both the finest and most controversial aspects of mobile gaming.
Understanding the Mechanics of the Eagle Artillery
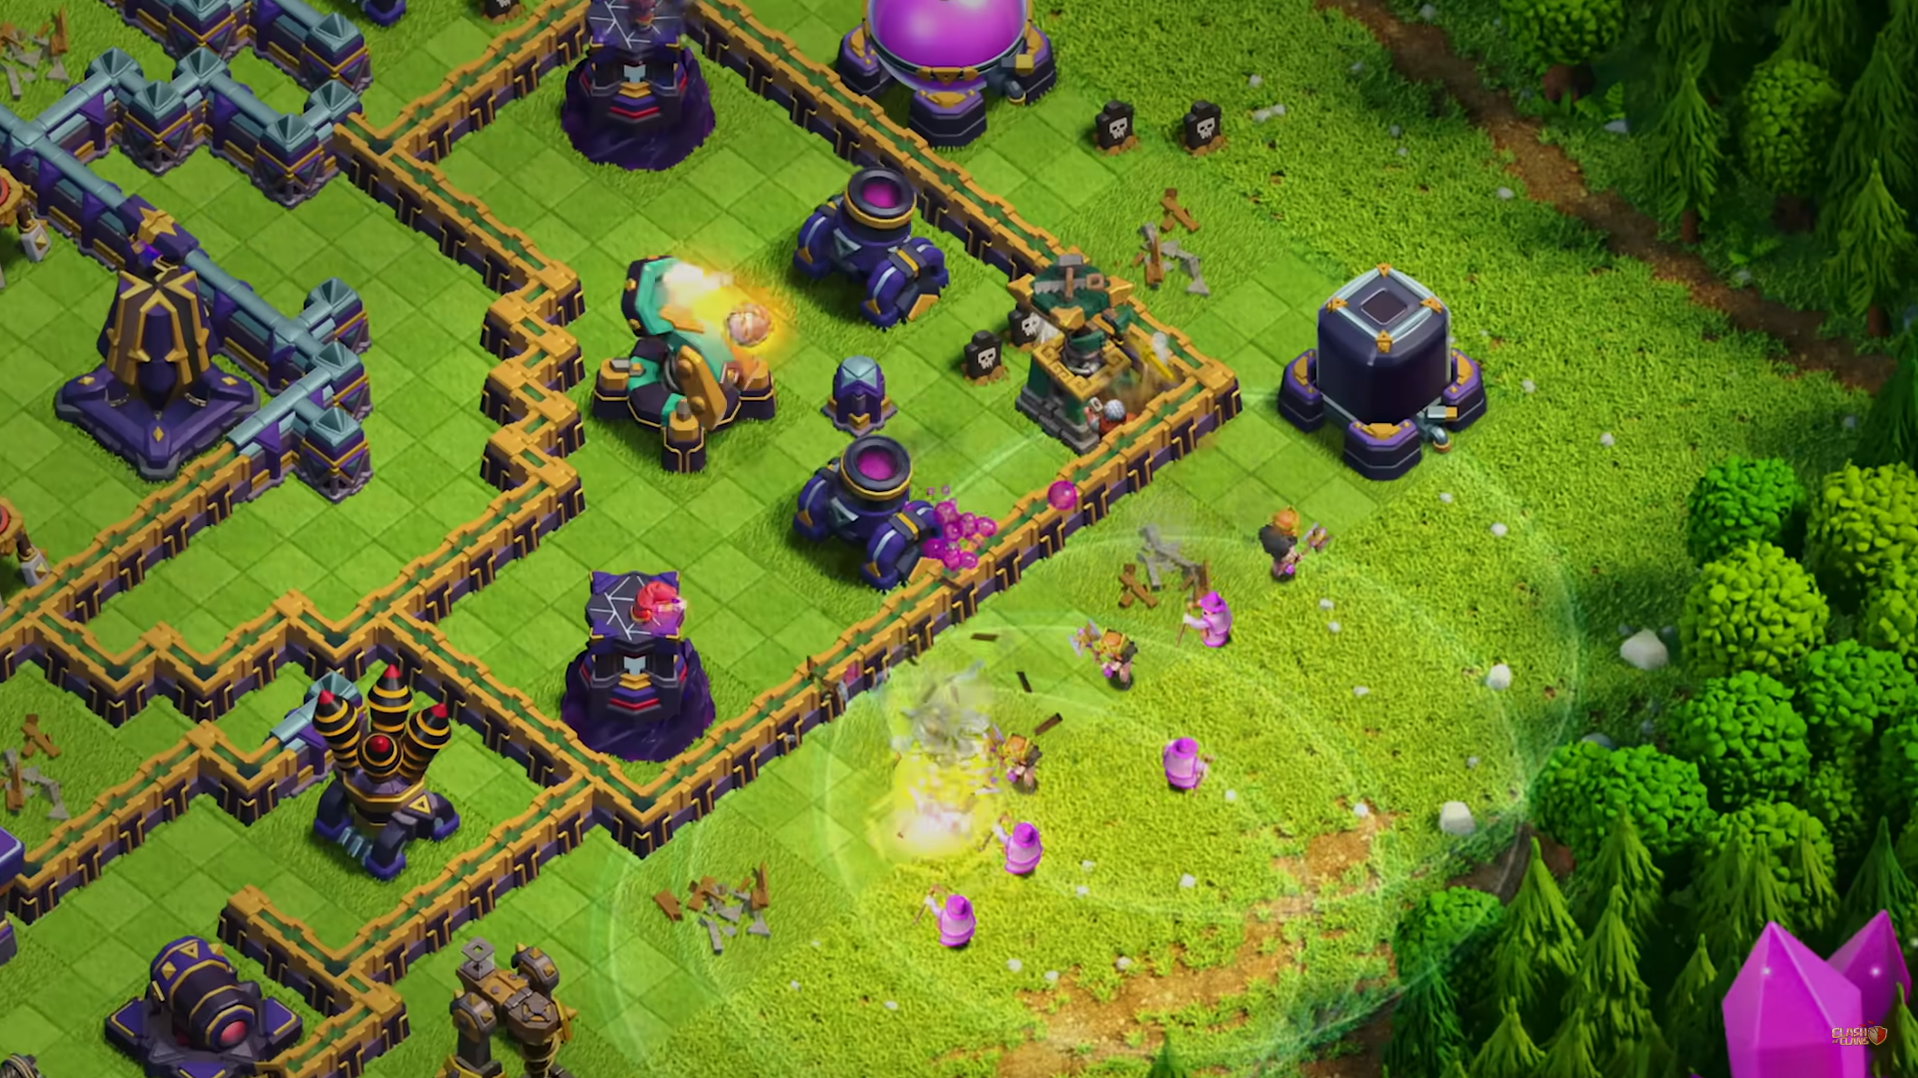
The Eagle Artillery operates on various levels:
- Activation: The Eagle Artillery becomes active once 150 Housing Space worth of troop capacity is deployed. Keep in mind that each Spell Housing Space also counts as 5. So, if you drop 2 Jump Spells, it is equivalent to deploying 20 Housing Space worth of troops;
- Shooting Pattern: It unleashes three volleys, each inflicting 250/300 damage upon impact, and repeats this every 10 seconds. This means it can deal triple damage to Golems;
- Dead Spot: The Eagle Artillery has a dead spot spanning 7 tiles around it. However, beyond this range, it covers your entire base, providing comprehensive defense;
- Target Prioritization: Its primary focus is on the area with the highest troop hitpoints. Typically, it will target Lava Hounds and Golems first before moving on to Heroes and other units.
Outsmarting the Eagle Artillery? Not So Fast!
Let’s debunk some common misconceptions about outsmarting the Eagle Artillery. Here’s what doesn’t work:
- Mixing Troops: Deploying Golems and Barbarians together, hoping that the Eagle Artillery will attack a Barbarian with every second shot, is a futile strategy. It won’t happen! The Eagle Artillery will prioritize attacking the Golems as long as they are alive. The same principle applies to Lava Hounds and Balloons. Mixing troops does not provide any advantage;
- Sequential Golem Deployment: Thinking that deploying Golems one by one, with a time gap in between, and then grouping them together will deter the Eagle Artillery is incorrect. The defense will still target the pack of Golems first because of the concentration of high hit points in a specific area;
- The Eagle’s Intelligence: Don’t underestimate the Eagle Artillery’s intelligence! If the first shell eliminates its target, the subsequent shells will swiftly re-target other troops instead of hitting open space. It adapts and redirects its firepower efficiently.
Mastering the Eagle Artillery: Tactics for Triumphant Victories
Before delving into attack strategies, it’s crucial to emphasize that a Town Hall 9 should think twice before taking on a Town Hall 11 base. While it’s feasible, it’s not the optimal choice. Now, let’s uncover successful approaches to overcome the Eagle Artillery. We’ll discuss BARCH, Giants & Golems, GoWiWi/GoWiPe, and Ballonian strategies. By adhering to key principles, you’ll emerge victorious against this formidable defensive structure.
Eagle Artillery and GoWiWi/GoWiPe
These assault strategies hinge on Golems acting as damage absorbers, allowing other troops to trail behind and annihilate structures in subsequent waves. In the past, prior to an update, it was comparatively simple to cluster the Golems together, depending on the quantity deployed. During that time, the Eagle Artillery’s area-of-effect damage posed a lesser threat.
Mastering the Art of Defeating the Eagle Artillery
In response to the recent alterations in the Eagle Artillery’s behavior, it is imperative to adapt your tactics accordingly. Rather than consolidating Golems, the new approach entails deploying them individually to avoid clustering. This strategy demands skill but extends their effectiveness during the assault. Preserving the survival of your DPS (Damage Per Second) troops is paramount, as they will infiltrate the Eagle Artillery’s dead spot region and dismantle it with ease.
Given the increased threat posed by the Eagle Artillery’s triple damage, it’s advisable to bring Freeze Spells. However, deploying them strategically is key:
- Timing is everything: Avoid casting the Freeze Spell during the 10-second break between the Eagle Artillery’s shots. This would be a wasted opportunity;
- Hold off during active firing: Refrain from deploying Freeze Spells while the Eagle Artillery is in the process of shooting. Until the Freeze Spell activates, the shells are still airborne, and freezing the reloading break won’t yield the desired effect.
Additionally, your Grand Warden, preferably at Level 5 or higher, will play a crucial role in keeping your troops alive for longer durations. Utilize his ability wisely to maximize his supportive impact.
2-Step Attacks
Understanding the rationale behind the activation system sheds light on its intended purpose. Supercell and the Clash of Clans team aimed to bolster 2-step attacks, considering it a compelling gameplay concept.
2-step attacks involve two phases, typically employing different troops and formations for each phase. The renowned Queen Walk is a popular hybrid attack strategy, utilizing the Archer Queen and Healers in the first phase, followed by the main assault in the second phase.
There are two types of 2-step attacks, distinguished by their primary objectives:
- Neutralize or infiltrate the Eagle: Taking down the Eagle Artillery or infiltrating its dead zone before activation is a smart move since it is a formidable defense. Capitalizing on the Eagle’s significant dead zone by infiltrating troops can be a tactical advantage;
- Inflict maximum damage: This tactic focuses on preparing for the primary attack by dealing as much damage as possible without activating the Eagle Artillery. It involves eliminating distractions and setting up a funnel for the main assault.
BARCH: Overcoming the Eagle Artillery
For meticulous farmers who employ the BARCH strategy, the Eagle Artillery presents a specific challenge—its ability to swiftly eliminate your Heroes.
Deploying your troops with ample spacing mitigates this concern to a certain extent. However, when employing your Heroes to target valuable resources like the Dark Elixir Storage, you’ll observe their vulnerability to the Eagle Artillery. To navigate this situation, consider the following tips to protect your Heroes against this formidable defense:
- Plan your Hero’s entry: Strategize the entrance of your Heroes to ensure they avoid the direct line of fire from the Eagle Artillery. Find alternate pathways or distractions that divert the attention of the defense, allowing your Heroes to reach their intended targets;
- Utilize support spells: Employ healing or rage spells to bolster your Heroes’ survivability when encountering the Eagle Artillery. These spells can provide an extra layer of protection, enhancing their chances of overcoming the defense;
- Time your abilities wisely: Activate your Hero abilities at opportune moments during the attack. Their abilities can grant temporary invincibility or increased damage output, allowing them to quickly dispatch threats, including the Eagle Artillery.
Giants & Goblins
A notable strategy that has experienced a remarkable resurgence in the recent Clash of Clans Update involves the utilization of Goblins. These nimble units have regained popularity due to their exceptional speed and their ability to effectively target the Clan Castle and Town Hall.
However, the presence of the formidable Eagle Artillery can pose a significant challenge, particularly when your Giants accumulate near the defensive structures and your Heroes are in close proximity. This is where the Eagle Artillery becomes a game-changer. To counter its impact, it is crucial to deploy a Healing Spell prior to the imminent strike and vigilantly observe the trajectory of the artillery’s projectiles as they ascend into the air.
Balloonion
Currently, I’m a devoted enthusiast of the Balloonion strategy, which I have been exclusively employing for over two weeks. With the assistance of Rage Spells, you can minimize the impact of the Eagle Artillery to just a couple of strikes before your Balloons are taken down. However, there’s a predicament when it comes to the Minions you bring along to clear Collectors and Storages, as they too fall victim to the Eagle Artillery’s attacks, along with your Barbarian King and Archer Queen. Employing Minions effectively to swiftly eliminate areas with multiple Storages will lead to quicker success.
Here are some helpful tips for your Heroes. Aside from that, you won’t need to concern yourself with much else, although it’s essential to deploy the Balloons in a proper formation.
Empower your Heroes to withstand the Eagle Artillery’s onslaught. While Heroes are vital for the success of various attack strategies, they often become prime targets for the Eagle Artillery earlier than desired. Heroes cannot hide or vanish, but they can prolong their survival by utilizing their special abilities. When facing off against the Eagle Artillery, it is imperative to carefully observe and time the activation of your Hero(es)’ abilities.
Archer Queen
The Eagle Artillery unleashes three volleys, collectively dealing either 750 or 900 damage. If the Archer Queen is at Level 12 or higher, she has the potential to survive this assault, but only if she hasn’t already engaged with other Defenses. Her Royal Cloak provides a healing effect that can shield her from one of the three strikes, but careful timing is crucial!
Ensure you activate the Royal Cloak after the first strike has landed, as activating it prematurely would result in a wasteful loss of its valuable healing boost. However, if the Archer Queen’s health has already dropped below 60%, it is advisable to activate the ability before the initial missile strikes to maximize the healing benefits.
Barbarian King
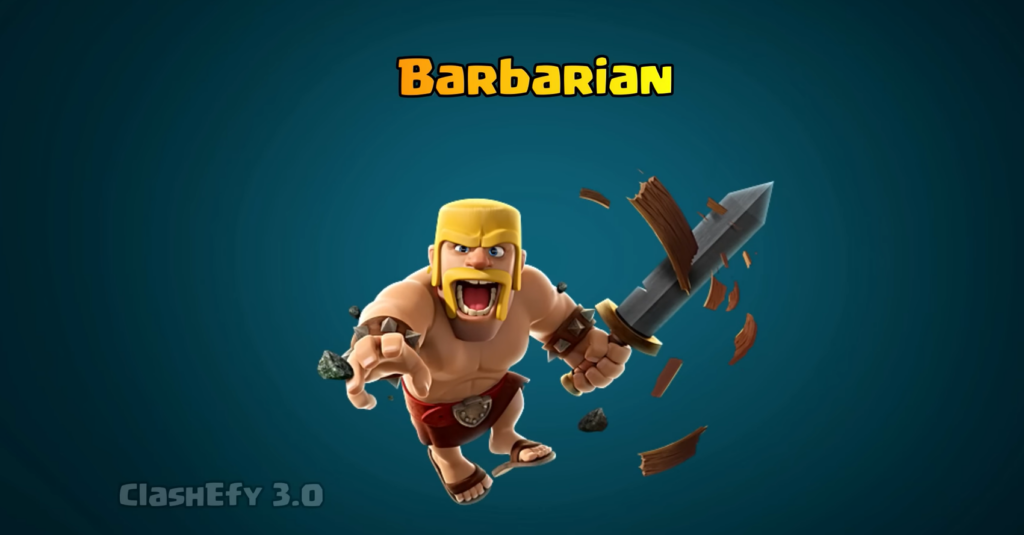
While this robust character stands a better chance against the Eagle Artillery, being at the forefront of the attack does not make things any easier. However, there is some good news regarding the Barbarian King’s resilience. If he begins the encounter at full health and is not heavily targeted, he can endure all three volleys from the Eagle Artillery. You can conveniently wait until his health drops below 50% before activating the Iron Fist ability, which will heal him through at least two of the Eagle Artillery’s strikes. It’s important to note that the Barbarian King is consistently under fire. Unfortunately, most of the time, he becomes the primary target of the Eagle Artillery, especially if deployed alongside the Archer Queen. Keep a close eye on his health bar, as it is likely to diminish swiftly.
Grand Warden
The Grand Warden does not have the capacity to endure all three volleys unleashed by the Eagle Artillery. To ensure his survival, it is imperative to activate the Life Aura ability before the volleys make contact with him. By timing the activation accurately, you can provide the Grand Warden with the necessary protection to withstand the imminent strikes from the Eagle Artillery. Also, keep in mind that the Life Aura doesn’t heal the Grand Warden. He is deployed with the other troops so you won’t see him in a one-on-one fight with the Eagle Artillery.
Conclusion
The Eagle Artillery does not effectively halt numerous attacks, provided the following measures are taken. Firstly, it is crucial to deploy large health troops separately, minimizing their proximity to one another. This strategic placement helps mitigate the impact of the Eagle Artillery’s area-of-effect attacks, preventing substantial damage to the entire troop formation. When utilizing Golems in your strategy, it is advisable to bring along Freeze Spells and deploy them at the opportune moment. Freezing the Eagle Artillery at a critical point can temporarily neutralize its offensive capabilities, allowing your troops to continue their assault unhindered. Also, it is essential to closely monitor your Heroes and the activation of their special abilities. Timing the use of their abilities can play a vital role in effectively dealing with the threat posed by the Eagle Artillery, ultimately maximizing the success of your attacks.